Introduction: Are You Ready to Make Perfectly Crispy Onion Rings at Home?
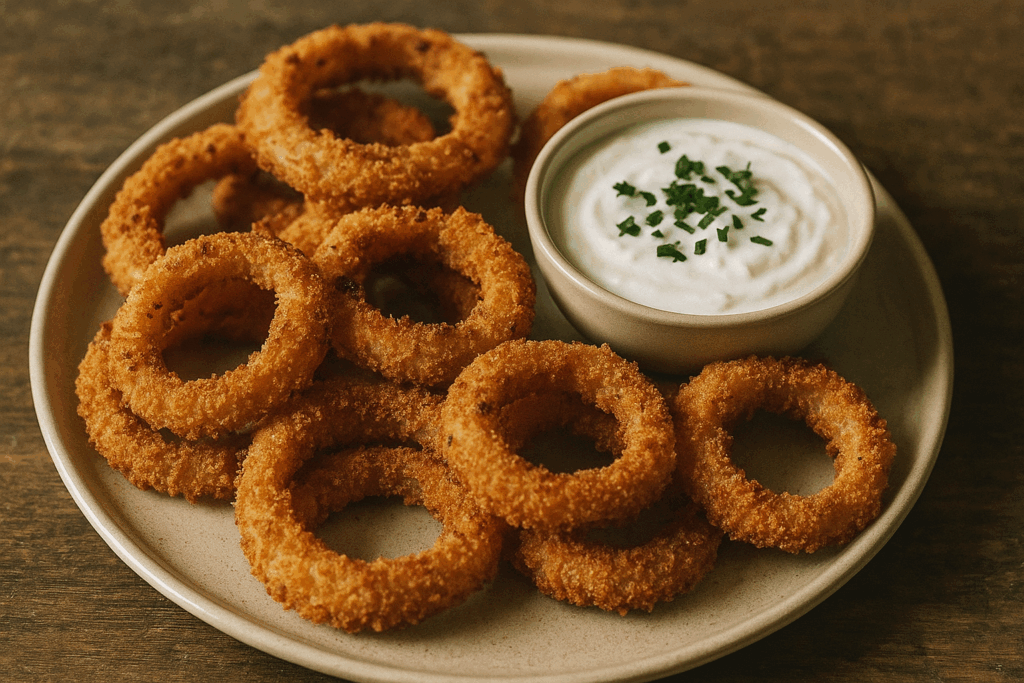
Crispy onion rings are a beloved snack or side dish that everyone can’t get enough of. But have you ever wondered if it’s possible to achieve that perfect golden, crispy texture without deep-frying and unhealthy oils? The answer is yes, and we’re here to show you how!
In this post, we’ll guide you step-by-step through the process of making crispy onion rings that are both crunchy and satisfying. We’ll also introduce a creamy yogurt dip that’s the perfect balance to these crispy treats. Whether you’re hosting a party or just craving a savory snack, these onion rings will impress every time.
Ingredients List
Making crispy onion rings from scratch is simpler than it seems, and the best part is you can customize the ingredients to suit your taste. Here’s everything you’ll need to get started:
For the Onion Rings:
- 2 large onions (yellow or red onions work best for a sweet flavor)
- 1 cup all-purpose flour (you can substitute with gluten-free flour if needed)
- 1 tsp baking powder (for extra crispiness)
- 1 tsp garlic powder (adds depth of flavor)
- 1 tsp onion powder (for a subtle onion taste)
- 1/2 tsp paprika (optional for a smoky flavor)
- Salt and pepper to taste
- 1 large egg
- 1 cup breadcrumbs (panko breadcrumbs will provide extra crunch)
- Oil for frying (vegetable oil or olive oil works well)
For the Yogurt Dip:
- 1/2 cup plain Greek yogurt (for a creamy texture)
- 1 tbsp lemon juice (adds freshness)
- 1 tsp garlic powder
- 1 tbsp chopped fresh parsley (optional for garnish)
- Salt and pepper to taste
Substitution Suggestions:
- Flour: Try using cornstarch for an even crispier texture.
- Breadcrumbs: Swap panko with crushed cornflakes for an extra crispy coating.
- Yogurt Dip: For a dairy-free alternative, try coconut yogurt or avocado dip.
Timing: How Long Does It Take to Make Perfectly Crispy Onion Rings?
The total time for making crispy onion rings with a yogurt dip is surprisingly quick! Here’s the breakdown:
- Preparation Time: 15 minutes
- Cooking Time: 10-15 minutes (depending on your frying method)
- Total Time: 25-30 minutes (up to 20% faster than traditional deep-frying recipes)
This recipe is ideal for those who want to prepare a crunchy snack quickly without sacrificing flavor or texture.
Step-by-Step Instructions
Step 1: Prepare the Onions
Start by peeling the onions and slicing them into 1/2-inch thick rings. Ensure that the rings are consistent in size to ensure even cooking.
Step 2: Make the Breading Mix
In one bowl, combine the flour, baking powder, garlic powder, onion powder, paprika, salt, and pepper. Mix thoroughly.
Step 3: Prepare the Egg Wash
In another bowl, beat the egg. This will act as a binding agent to help the breadcrumbs stick to the onions.
Step 4: Coat the Onion Rings
Take each onion ring and dip it first into the flour mixture, then the egg wash, and finally into the breadcrumbs. Make sure the onion rings are well-coated at each stage to achieve maximum crispiness.
Step 5: Fry the Onion Rings
Heat oil in a deep skillet or frying pan over medium heat. Test if the oil is hot enough by dropping in a small piece of bread—if it sizzles, it’s ready. Carefully fry the coated onion rings in batches, ensuring they don’t overcrowd the pan. Fry for 2-3 minutes on each side, or until golden brown and crispy.
Step 6: Drain the Excess Oil
Once the onion rings are crispy and golden, remove them from the oil and place them on a paper towel-lined plate to drain any excess oil.
Step 7: Prepare the Yogurt Dip
In a small bowl, combine the Greek yogurt, lemon juice, garlic powder, and a pinch of salt and pepper. Stir until smooth and creamy. Garnish with fresh parsley for an added touch of color.
Nutritional Information
If you’re looking to enjoy your crispy onion rings guilt-free, here’s a general breakdown of the nutritional information (per serving of onion rings with dip):
- Calories: 220
- Carbs: 30g
- Protein: 6g
- Fat: 10g
- Fiber: 2g
- Sodium: 450mg
These onion rings are a great option for a quick snack, and when paired with the yogurt dip, they provide a balanced mix of protein, carbs, and healthy fats.
Healthier Alternatives for the Recipe
You don’t need to sacrifice flavor for health. Here are some ways to make this recipe even better for your health:
- Air Fryer Version: Swap out deep frying for air frying to significantly cut down on oil and calories.
- Whole Wheat Flour: Use whole wheat flour instead of all-purpose flour for added fiber.
- Greek Yogurt Dip: Instead of regular yogurt, opt for low-fat or non-fat Greek yogurt to reduce calories.
- Vegan Option: Use plant-based breadcrumbs and swap the egg for a flaxseed egg (1 tbsp ground flaxseed + 3 tbsp water).
Serving Suggestions
Pair your crispy onion rings with a range of delicious sides and dips to create a perfect meal:
- Burgers: Serve as a side with a classic beef or veggie burger.
- Salads: Add a few rings to your salad for a fun crunch element.
- Dipping Sauces: Besides the yogurt dip, you can also try spicy ketchup, ranch, or a zesty mustard sauce.
- Snack Plate: Create a snack platter by pairing onion rings with fresh veggie sticks and hummus.
Common Mistakes to Avoid
Even though making crispy onion rings is easy, there are some common mistakes you should avoid:
- Overcrowding the Pan: This prevents the onion rings from crisping up evenly and can cause them to become soggy.
- Not Heating the Oil Properly: If the oil isn’t hot enough, your onion rings will absorb too much oil and lose their crispiness.
- Skipping the Double Coating: Ensure each onion ring gets a double coating of flour and breadcrumbs for that extra crunch.
- Using Too Much Oil: Using excessive oil can lead to greasy onion rings, so make sure to fry in batches for the best results.
Storing Tips for the Recipe
If you have leftovers, here’s how to store your crispy onion rings to maintain their freshness:
- In the Fridge: Store leftover onion rings in an airtight container for up to 2 days. To reheat, place them on a baking sheet and bake in a preheated oven at 350°F for 5-7 minutes to restore their crunch.
- Freezing: For longer storage, freeze the onion rings on a baking sheet until solid, then transfer them to a ziplock bag. They can last up to 3 months in the freezer. To reheat, bake from frozen in the oven for 10-12 minutes.
For more delicious cooking ideas and recipes, explore the full collection on our website!
Conclusion
Making crispy onion rings at home is easier than you think, and with our yogurt dip, you’ll have a snack that’s both satisfying and refreshing. Whether you’re having them as a side dish or as a crunchy snack, these onion rings are sure to impress. Try the recipe today, and don’t forget to share your feedback in the comments section below!
FAQs
Q1: Can I make these onion rings in the oven instead of frying?
Yes, you can bake them for a healthier option. Preheat your oven to 425°F, place the coated onion rings on a baking sheet, and bake for 20-25 minutes, flipping halfway through.
Q2: How can I make the yogurt dip spicier?
To add some heat to the yogurt dip, try adding a small amount of cayenne pepper or a dash of hot sauce.
Q3: Can I use frozen onions for this recipe?
While fresh onions are best for this recipe, you can use frozen onion rings if you’re short on time. Just make sure to bake or fry them according to the instructions on the package.
Q4: Are onion rings gluten-free?
If you want a gluten-free version, simply swap the flour and breadcrumbs with gluten-free alternatives. Be sure to check the labels to ensure all ingredients are certified gluten-free.